Sold out. All gone.
8-9-2020: Sold out. All have been sold.
BUT: Someone bought all my tooling and left over brackets/parts etc and is looking to make these kits again using aftermarket motors. We'll see in time if he is successful. I'll update my page as I hear from him.
Upgrade to really fast electric window motors!
NOTE: Many things contribute to slow electric windows. All the electrical connections (starting at the battery) degrade over time, corrode etc. If the dew wipes are hard that can make them go slower. WIring connections degrade over time. Switches get dirty. The tracks get full of dirt and the grease turns into putty. One can take everything apart and clean and relube everything.
You can also upgrade to HD electric window motors:
This was originally an idea of Fierobsessed on the Fiero Forum. Fierobsessed found these electric window motors and mounted these new motors on a steel plate and then mounted them on the Fiero window scissors lift assembly. The problem Fierobsessed had was clearance between these larger electric window motors and the channels the glass rides on. I looked at this for a length of time and devised a way to mount them lower providing more clearance by mounting the plates on top of the motors. Paul Smith worked with me to work out the kinks and he has installed them in one of his Fiero's and it worked out well. Although the clearance is minimal it was around 1/4".
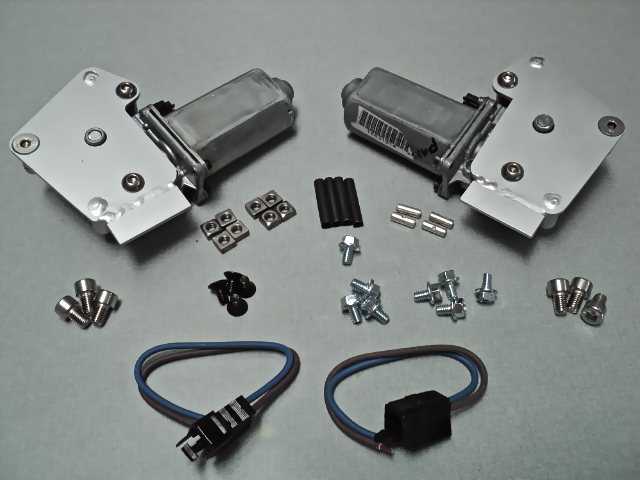
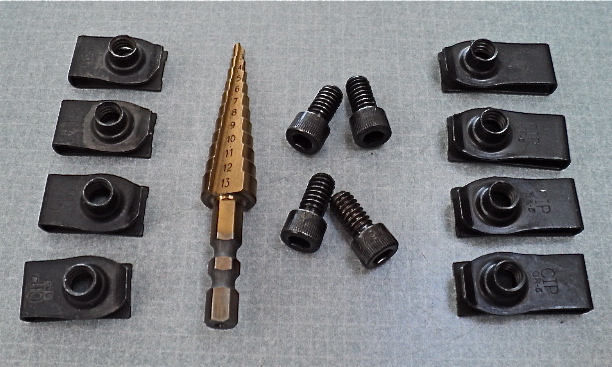
This is the kit, it is very complete
The trick to making this modification work is I mount the electric motor to a laser cut steel plate that is mounted on top of the motor. This motor/plate assembly then gets mounted to the steel window scissors lift assembly. I also do some modifications to the electric motors so they sit lower.This is as low as you can go.
 |
 |
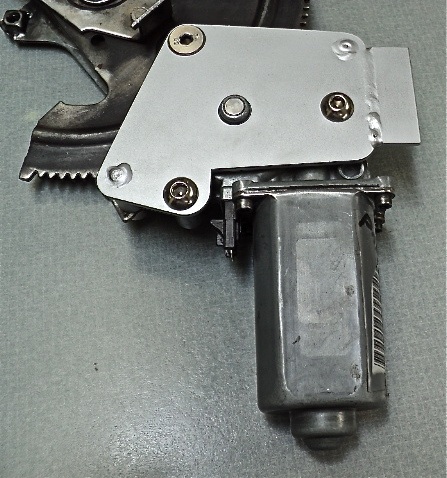
| New motor mounted to a scissors assembly |
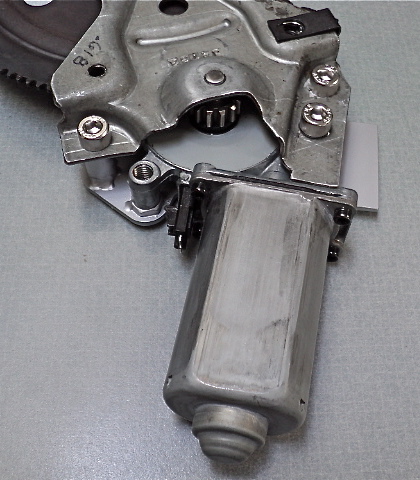
Underside view. Kit includes the Allen head fasteners |
 |
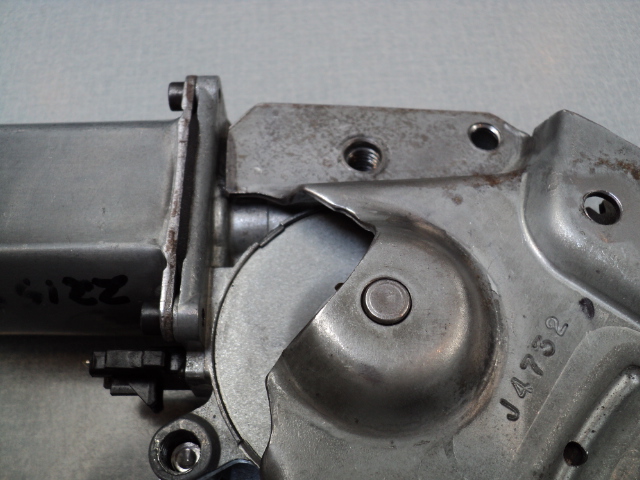 |
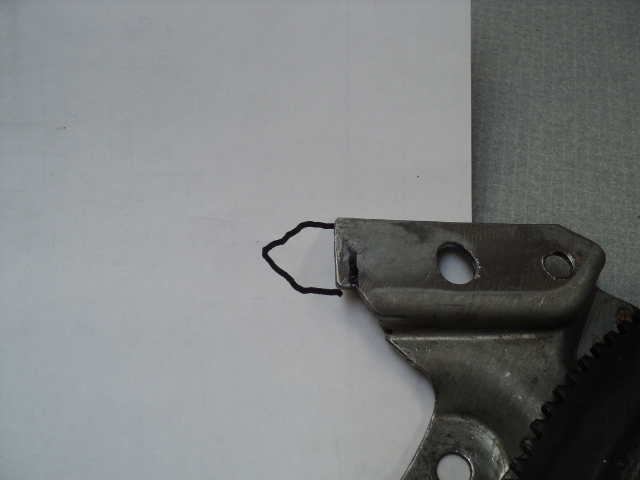
| A small area needs to be cut off the scissors assembly. Drill out the two remaining motor mounting holes to 3/8" or 10 mm. With the two mounting holes drilled out and the ear cut off mount the motor to the scissors assembly with two 8 mm Allen bolts included in the kit. |
Showing the motor and how it fits with the small area of steel removed from the scissors lift bracket. To locate the third hole bolt the motor to the scissors bracket and mark the location of the third hole. Take the motor off and drill the third mounting hole. |
When you bolt the motors on to the scissors assembly for the final time rotate the large gear so it is at about at the 3/4 window up position. At the 3/4 window up position allows you to install the assembly back in the door with no clearance problems.
NOTE: Before the final installation: The gear and scissors gear need to be greased. If left dry it wears faster.
The wiring harnesses need to be extended to reach the new motors. Included in the kit are 2 new pigtails with 6" leads on them. You cut off the ends from your existing door wiring harness then use the supplied butt splices plus adhesive lined shrink tube to make the wires to the motors longer and also waterproof. The wires are opposite. The blue connects to the brown and the brown connects to the blue.
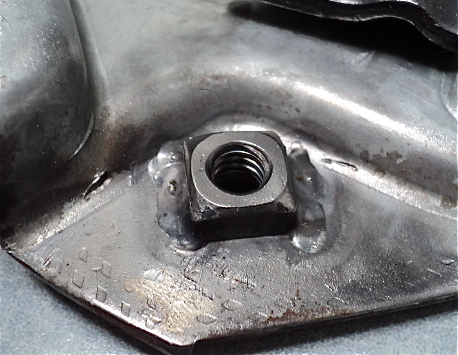
How do I attach the window motor scissors assembly back into the door? The preferred method is to weld in four 1/4 x 20 square nuts as shown in the picture above. I include eight unplated 1/4 x 20 square nuts if you choose to do it this way. Also included are four 1/4 x 20 flat head screws. You use the flat head screws to hold the nuts in place before welding. This trick insures the square nut is perfectly centered over the hole on the steel scissors plate. Note: If you happen to have a HD rivet gun you can use large aluminum rivets again.
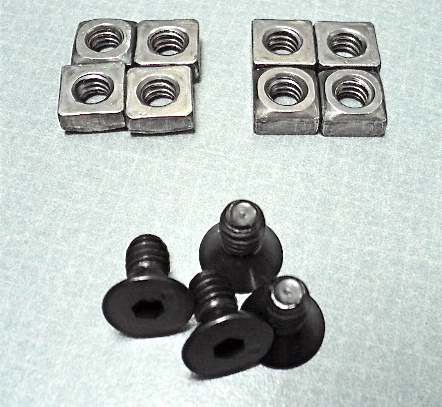
Included are eight new 1/4 x 20 serrated flange bolts to mount the scissors assembly back into the doors.
Optional mounting kit:
To make this as easier kit to install and not require welding I also offer an upgrade kit that includes eight 1/4 x 20 U nuts and a step drill. But remember: You are trying to keep the motor at a minimum height, using these clip nuts raises the scissors assembly around 1 mm. That should generally not be a problem.
 |
|
 |
 |
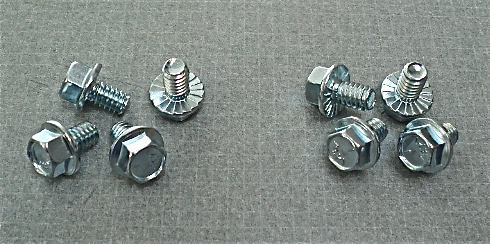
| U nuts, longer Allen head bolts and step drill. |
|
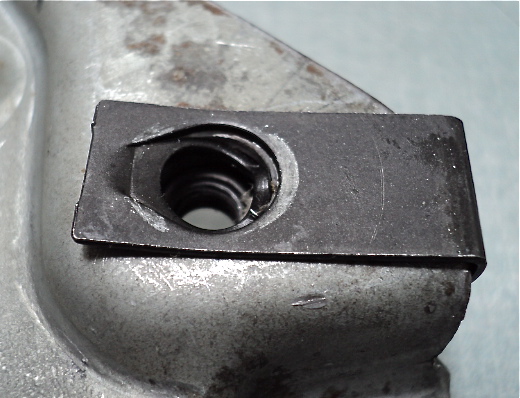
The holes in the scissors lifts have to be drilled larger (10 mm) to accept the four U nuts. |
Hole on the right has been drilled larger with the step drill to accept the U nut. |
Special installation note when using the U nuts: Because the clearance between the large gear and the steel scissors plate is minimal I include four 1/4 x 1/2" long Allen head bolts to help the installation when using the U nuts. When installing the scissors assembly back in to the door use the four longer Allen head screws to get it mounted and in place. Once all four Allen head bolts are tightened remove one Allen head bolt at a time and install the shorter serrated flange bolts. Do not leave the four longer Allen head bolts in. They may hit the large gear.
Additional installation tips:
.jpg) .jpg) |
|
|
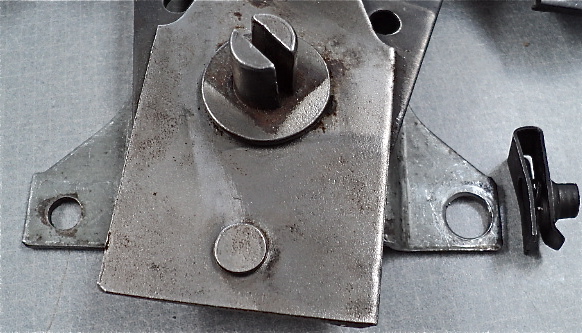
| Clamp the assembly securely in a heavy duty work bench vice as shown. Install a U-clamp to keep the spring in place on the scissors assembly. Grab the spring with a large vice grips and rotate it around and over the tab. This is the passenger side assembly. |
|
|
Not much more work than installing new aftermarket stock replacement electric motors in your Fiero. The scissors assembly has to be removed and these new motors installed on the scissors assembly.
I am not offering this as a DIY kit. I do several machining/milling modifications to these electric window motors to make them work in my kits.
Install this yourself or if you do not have the skills needed have a professional install this kit.
SHIPPING NOTE:
I do not offer free shipping.
Because I use postal flat rate boxes for heavy orders there is no program that can add the proper amount of shipping to every order. So all shipping is added manually by myself after you place your order. That is explained here: Shipping added later explanation
When you place an order the shipping amount will show $0.00. Soon after you place an order you will receive an email confirmation that shows the amount of shipping that was added to your order.
Shipping:
Shipping is $14.00 (Midwest USA)
Final shipping cost is determined by weight of the item(s) and distance from Milwaukee, WI. Shipping prices quoted are for items shipped to the Midwest area in the USA. If you are ordering a single item or multiple items the total shipping price is determined after you place the order. I try to keep my shipping prices to a minimum and use Postal Flat Rate boxes whenever I can utilize them for an order.
