This is a step by step installation guide with pictures on how to install the new second design headlight motor upgrade into your 84-86 Pontiac Fiero.
Included in the kit is a paper instruction manual. Use this web page along with the paper instruction sheets to help guide you thru the installation process.
This kit can be installed with the hood left on or removed. Removing the hood gives you slightly more room to work. Leaving the hood on is fine. I installed one kit with the hood off and four kits with the hood left on and there is plenty of room to insall this kit with the hood left on. If you choose to remove the hood outline the hinge locations on both sides of the hood with a pencil, thin marker or such so when reinstalled you can return it to it’s original location. Remove the 4 bolts holding the hinges on the hood. Leave the hinges bolted to the chassis. You should have one or two helpers to hold the hood while you remove the hood.
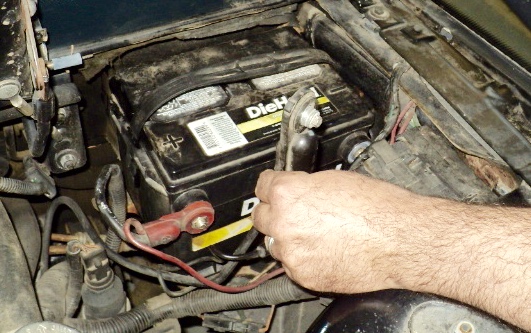
Disconnect the battery. No exceptions:
Disconnect the battery. This is very important. The red wires feeding the headlight lift system are hot at all times. You have to disconnect the battery before you start to install this kit. Do not skip this step.
The battery has to be left disconnected thru this whole installation process.
NOTE: Installing this kit can take 3-4 hours. Read every step carefully until you understand the step. Make sure you complete each step before moving on to the next step.
When we were finished installing the new system it looked very close to factory original and looked very clean. When we finished everything we connected the battery and the headlight system worked like new again.
This is the first version of these installation instructions. If you have any suggestions I would be willing to make any changes, additions etc.
A note before you begin:
Try to remember to put the shrink tubes on the wires before crimping and soldering the butt splices. We forgot to solder the butt splices on one connector to a headlight motor and we had to redo one plug on one headlight motor. It is so easy to forget the shrink tube before crimpng the butt splices and soldering the butt splices. I include three extra butt splices and three extra shrink tubes in the kit just in case you mess up like we did. :)
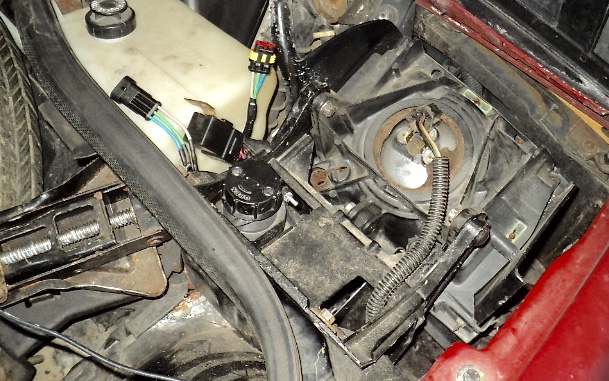
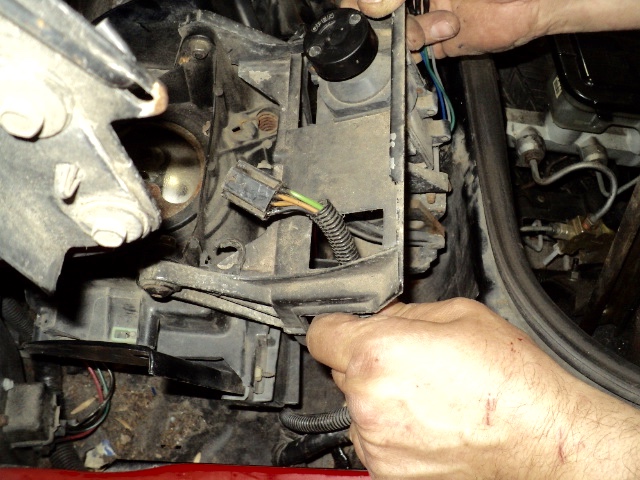
Step one: Remove both headlight buckets:
With the battery now disconnected (the battery has to be left disconnected thru the whole installation process) unplug the wires to both headlight bulbs. Open the black plastic clips (one on each headlight bucket) holding these wiring looms to the headlight bulbs. Unbolt both relays from the headlight buckets.
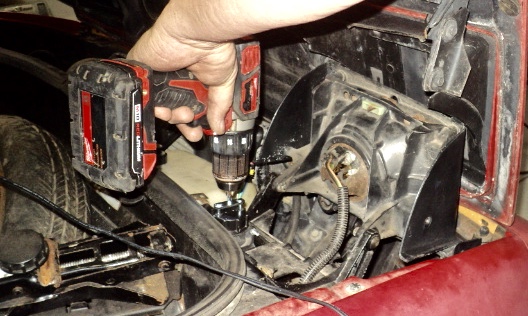
Use the 2 prong tool and a variable speed reversible drill (cordless prefered) carefully crank the headlight motors to their full or mostly full up position. Read the note below first. Make sure your drill is rotating the correct direction before doing this.
NOTE:
If you rotate the knob too forcefully with the hand drill you can break the headlight motor plastic housings internally at the end of the up and down travel. As you rotate the knobs wiggle the headlight bucket with your other hand up and down. As you get close to the end of it's travel you will notice the amount of slop decreases. When the amount of slop decreases you should stop rotating the knob. This is not the end of the travel but it is very close to the end of the travel.
There is an arrow on the top of the knobs indicating which direction to rotate the knobs.
Insert the double prongs of the tool into the 2 holes in the black plastic knobs on the headlight motors and lift the headlight buckets to the full open (or mostly full open) position:
Using a 10 mm socket loosen the bottom nuts holding the headlight buckets to the chassis (2 on each headlight bucket). You do not need to remove these two bottom nuts.Only loosen them.
Use the tool and crank the headlight motors to the full (or mostly full) down position. Loosen and remove the top nuts holding the headlight buckets to the chassis (2 on each headlight bucket):

With the headlight buckets now in the down position lift the headlight assemblies out of the car and put them on a work bench or suitable work table:

If you are also rebuilding the headlight motors do that now. Do one headlight motor at a time so you can reference the other one when you reinstall the motor and arm.
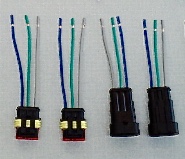
Step two: Install the new plugs included in the kit on both headlight motors:
Important tip: Before you start on a step gather all the parts that are used in that step and lay them out in a clean location. This way you will see what parts you are using and will be less likely to forget something.
Important note on installing the butt splices
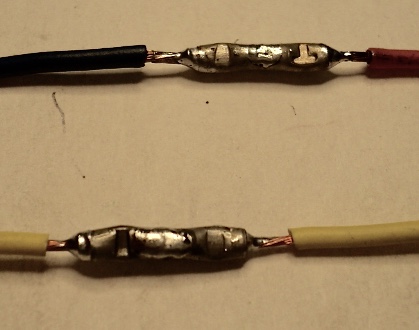
We found the solder does not always like to flow well into the middle of the butt splces. So to make a better connection I have changed to this:
Strip the wires back about 1/2". Crimp the butt splices in the middle of the barrels. Solder both the middle and the outer ends. You can even flow some solder out and over the butt splce on the ends. This in my opinion is the best way to insure a very good durable connection.
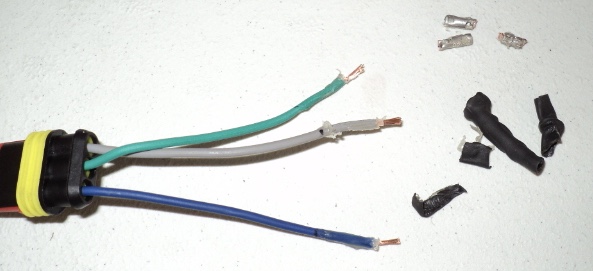
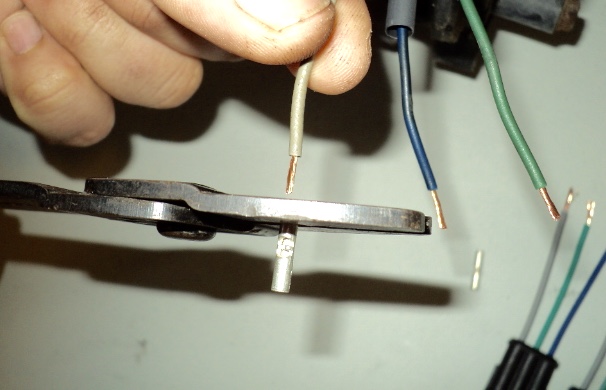
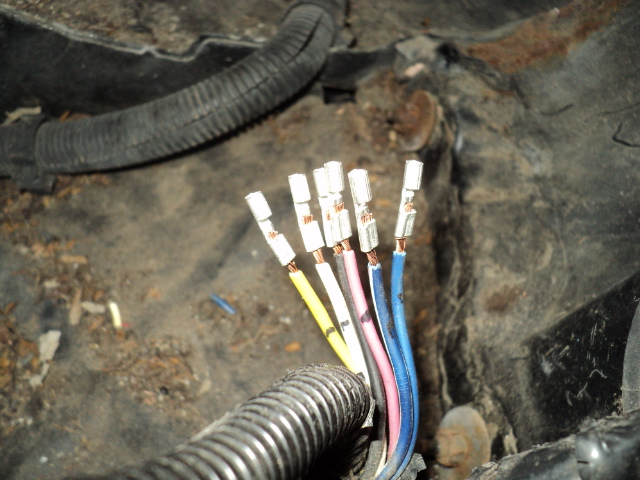
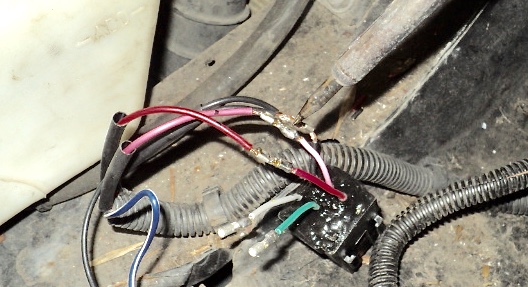
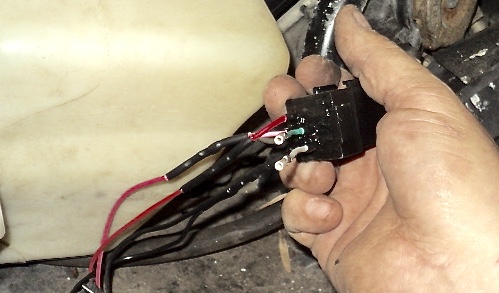
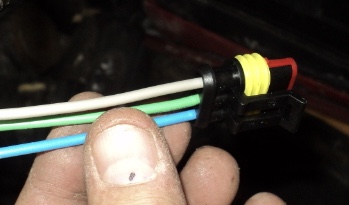
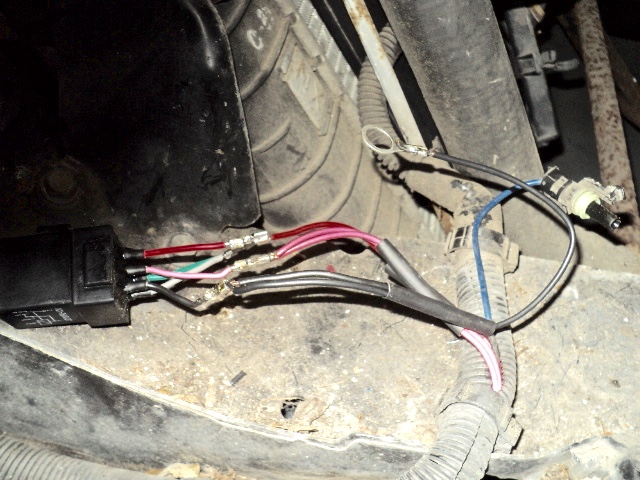
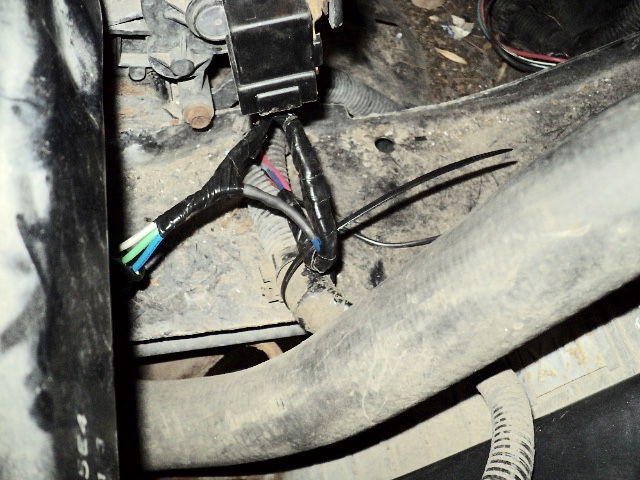
There is a pair of three wire plugs included in the kit in a bag marked headlight motor plugs. You will be installing these black connectors to the headlight motors. Use the two all black plugs on the headlight motor leads:
Cut off the original plastic plugs to both headlight motors. Cut all three wires about an inch from the old plastic plugs plugs (so most of the of wire length stays on the motors). Next cut all three wires so they are all the same length. Cutting them about an inch away from the plugs insures the copper wire is nice and clean.
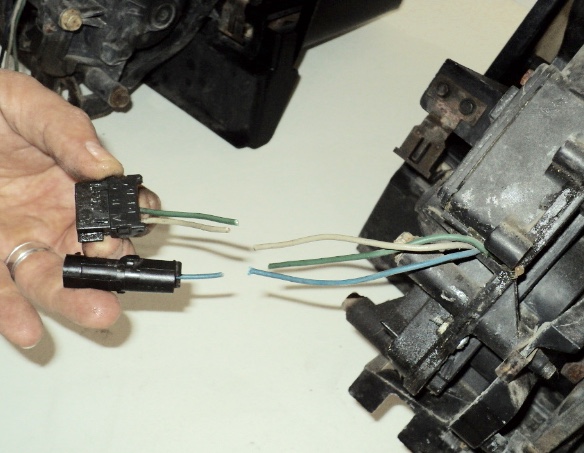
Strip the ends of all three wires on both headlight motors 1/2". If you find any wires are corroded use some fine sand paper and carefully sand the copper wires until they are clean. One popular trick is to use vinagar to clean the copper wires then baking soda to neutralize the vinagar. Do a search on the internet for this process. Do not try to solder corroded copper wires. It will not take solder well and you will have a bad connection.
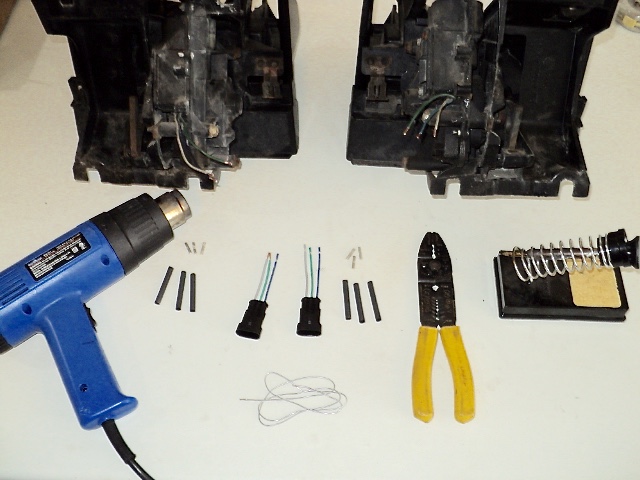
Tools and materials used to install the new headlight motor plugs:
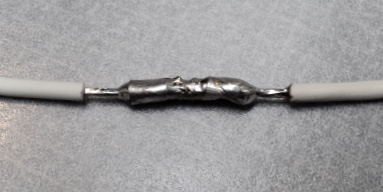
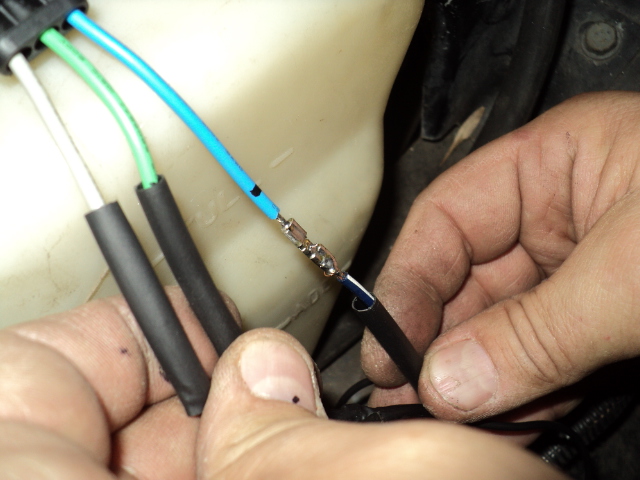
NOTE: Most all of the pictures from here on down show my first method of soldering the butt splices in the middle only. I found in some butt splices I soldered the solder did not flow well into the center of the butt splice. Possibly because they are air locked. I have changed to a new type of butt splice now that has a larger open area in the middle. Use the method I show below. Strip the insulation back 1/2" and solder both the middle and both ends of the butt splices. You can even use a small sharp tool and lift the wires in the middle slightly to help the solder flow around the wires in the middle:
Putting the new plugs on the headlight motors:
With all the wires stripped back 1/2 crimp a butt splice on all 3 wires on the new pigtails. NOTE: Crimp the butt splices in the middle of the outer ends. This allows more solder to flow on to the wires in the next step. Install three shrink tubes (one on each wire).
A trick to crimping on the butt splices: Put the butt splice in the crimping tool first then put the wire into the butt splice and crip it.
NOTE:
Don’t forget to install the 3 shrink tubes before crimping on the new pigtails. It is very easy to forget to do this. In the kit I include 3 extra butt splices and 3 extra pieces of shrink tube in case you mess up. :)
Another note: When I installed this kit on a local owners Fiero we forgot to solder the butt splices before we shrunk the heat shrink tube over one headlight motor. We had to cut out the butt splices and remove the heat shrink and redo that plug. This experience made me add the extra shrink tube and butt splices to this kit. It is easy to mess this up. Take your time and make sure every step is complete before moving on to the next step.
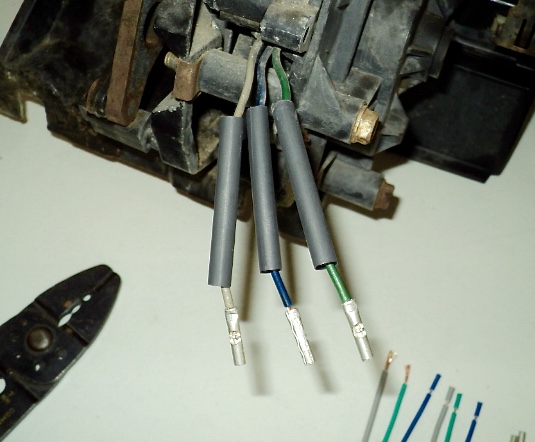
With the shrink tube on all 3 wires - crimp the headlight motor wires to the new plug matching the colors blue, green and gray (Again crimp them in the middle of the barrels).
NOTE: Make sure you have installed the three pieces of shrink tubing before crimping the new connector on these wires.
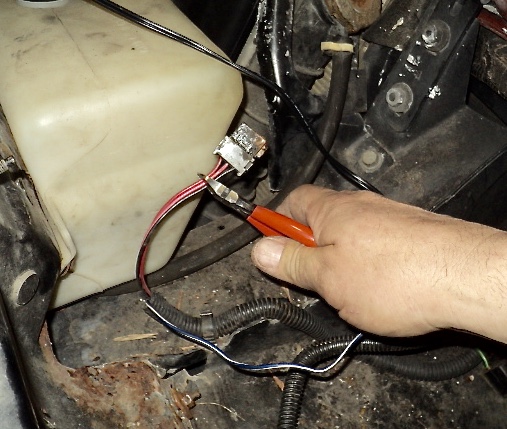
Solder the butt splices. The center area of the butt splices is open. Apply the solder to that center opening and on both ends until the solder flows well to both wires and on both ends of the butt splice. Make sure the shrink tube is far enough away so it does not start to shrink on you. Soldering the butt splices insures a solid connection that will not get loose over time. I strongly suggest you do not skip this step.
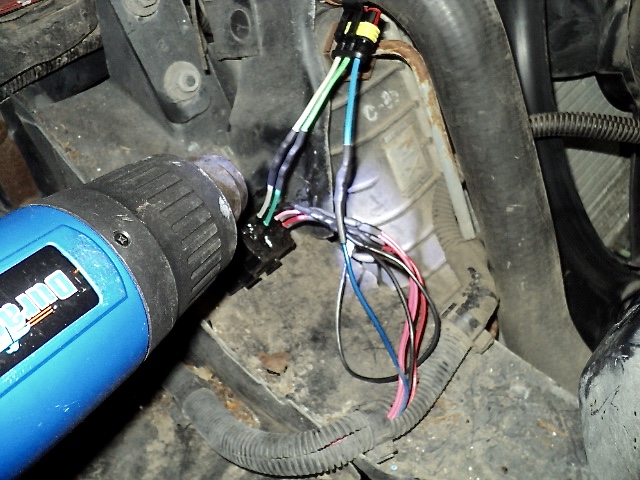
Slide the shrink tubes over the butt splices centering them. A nice trick is to hold the shrink tube next to the wires and mark the wire when the shrink tube is in the correct location. This insures the shrink tube will be perfectly centered on the butt splices. Use a heat gun and shrink them until a small amount of clear sealant flows out of both ends. You now have solid long lasting waterproof connections on your new headlight motor plugs.
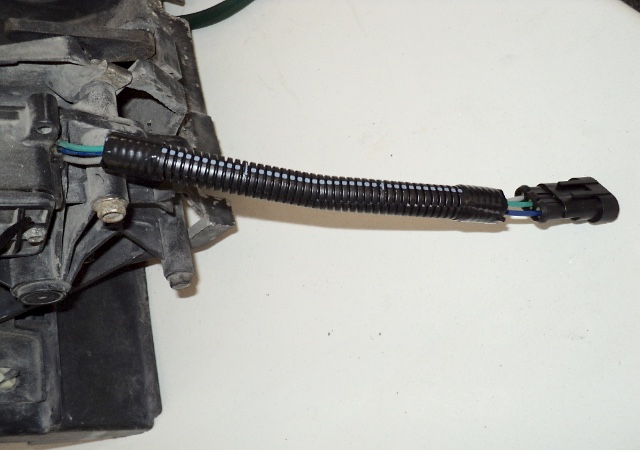
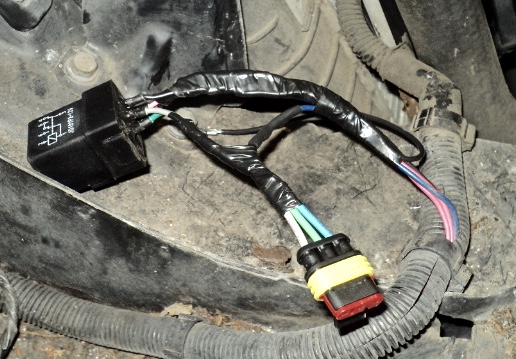
Install a piece of the convoluted tube on each of the headlight motor wires. Tape the ends with black electrical tape:
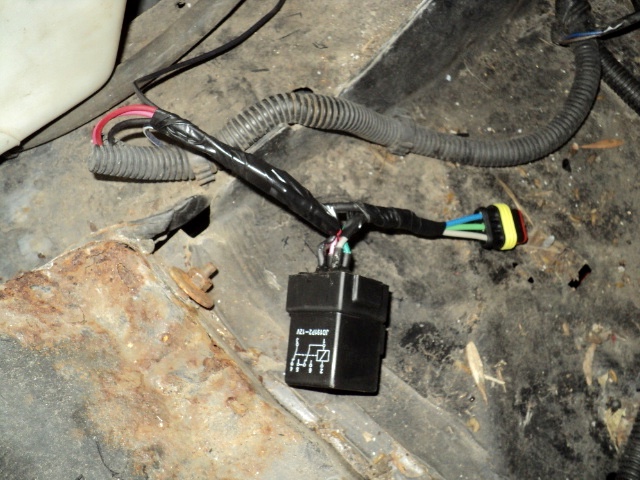
Step three: Install the new isolation relay:
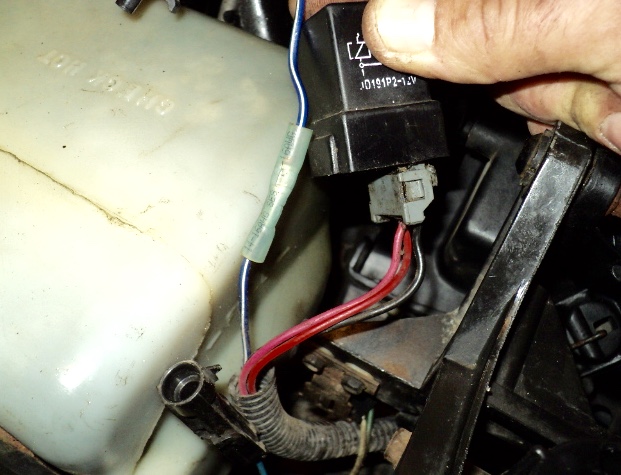
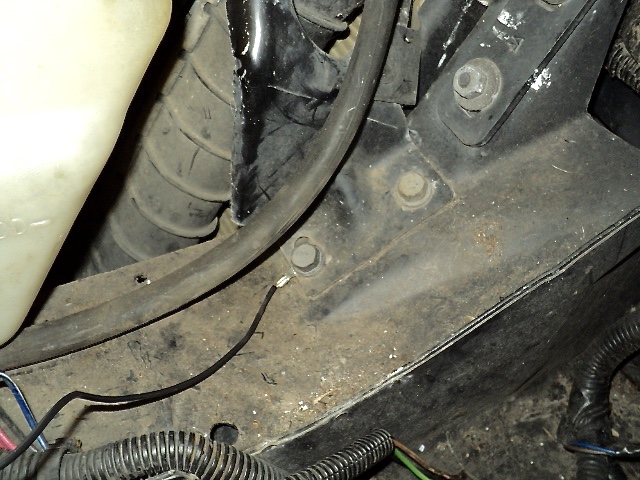
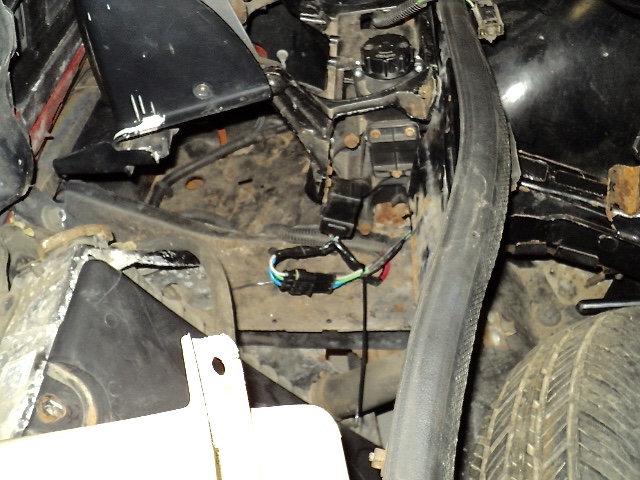
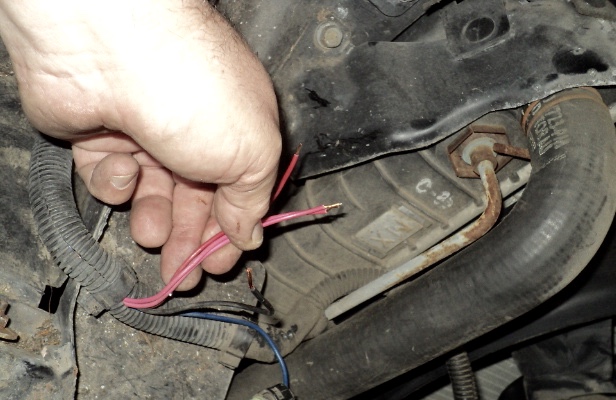
Unplug and remove the original isolation relay. It is next to the headlight bucket on the drivers side on the side panel. It has 6 wires going into it.
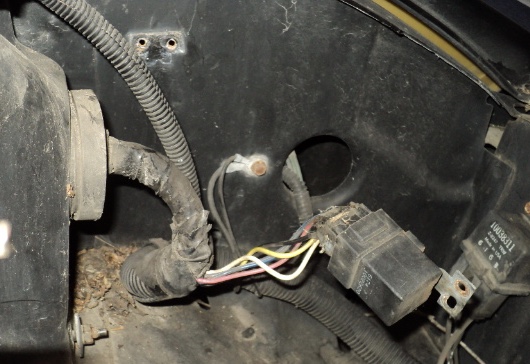
Cut the two plugs off and make all the wires from the wiring loom equal length. Leave about one inch of wires on the old plugs. This insures you should have clean copper wires when you strip these wires.
Strip the 6 wires coming out of the factory wiring harness back about 1/2”. Crimp on the 6 butt splices.
Strip the wires on the new isolation relay back 1/2” (they are stripped back a small amount because I have to test them in my test fixture). Hold a piece of shrink tube next to the wires and using a black Sharpie put a mark on them indicating the half way point. This insures you center them when you apply heat to the shrink tubes.
We then wrapped the wires with black electrical tape.

To help keep these wires away from the moving headlight bucket we put the wires behind the main wiring harness. Screw the new isolation relay back on to the side wall.
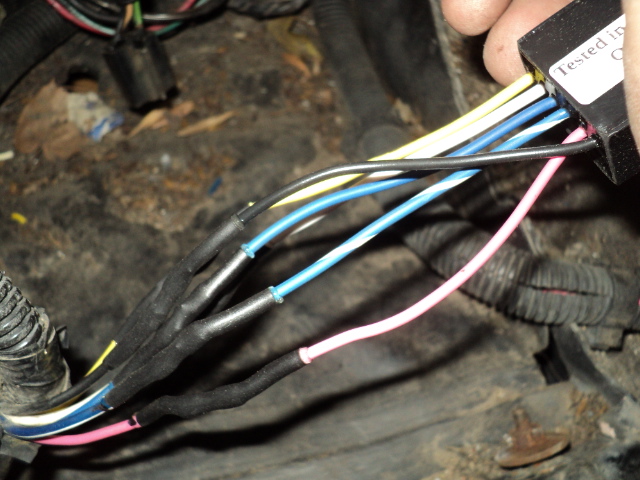
Rework the wiring for the passenger side headlight motor/relay:
Cut the three wire plug off the wiring harness. The wire colors are red, pink and black. Cut these wires about 1 inch back from the plug. This helps insure that you have clean copper wire under the plastic insulation on the wires.
Cut the blue wire to match the 3 others wires so they all are the same length. Strip all 4 wires about 1/2".

Use a piece of shrink tube and again mark the half way point on all 4 of these wires so you can center the shrink tubes later.
Put a piece of shrink tube on the red, pink and black wires.
You will now be adding an additional black ground wire. This insures you have a good ground. Take one of the black wires included in the kit. Strip one end back about 1/2". Now slip this black wire thru the heat shrink tube that is around the black wire from the factory wiring harness. Twist the ends together. NOTE: We had a hard time keepig these wires twisted together so we soldered it some.

Install the new passenger side relay:
Take the relay marked passenger side. Crimp the red, pink and black wires to it. Solder the butt splices.
Slide the shrink tubes over the butt splices and heat them to shrink them.
Strip the other end of the black wire back about 1/4". Crimp and solder on the large eyelet included in the kit.
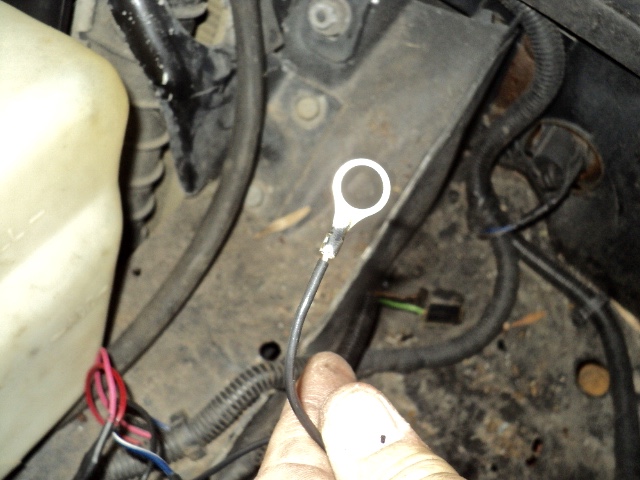
Remove the lower radiator shroud bolt and install this eyelet on it.
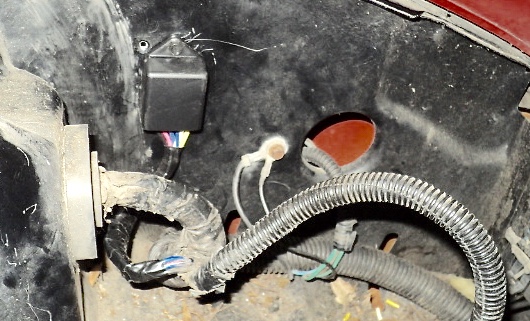
Install the new disconnect:
Strip the wires back about 1/2". Using a shrink tube mark the half way point on these wires.
Put a piece of shrink tube on these 3 wires. Crip the new disconnect to the blue, green and white wire. Solder the butt splices. Center the shrink tubes and heat them to shrink them.
Wrap all the wires with black tape. The black ground wire has to exit the loom about an inch from the factory convoluted tube.
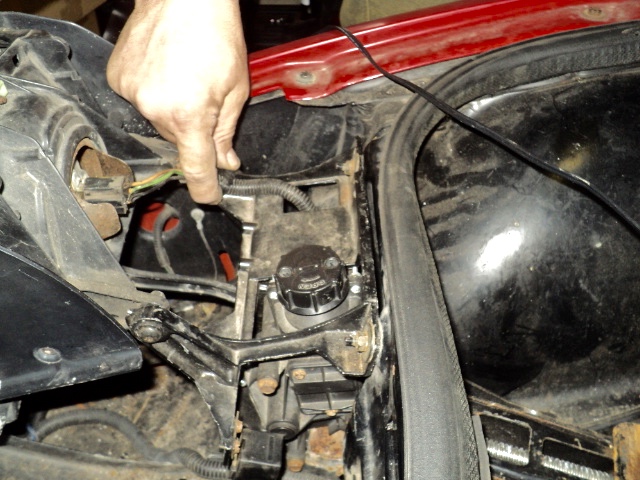
HANDY TIP: We found it is easier to remove the steel piece from the old relay and bolt it to the headlight bucket at this time. It is easier to slide the new relay on this steel bracket once the headlight bucket is installed. So remove the old steel bracket from the old relay and bolt it to the headlight bucket.
Now put the headlight bucket back in place. Put the 2 top nuts on and tighten them.
Usde your cordless drill and raise the headlight up. Now use the tool in your variable speed drill and turn the top knob to lift the headlight bucket all the way up or most of the way up. Be careful you do not hit the end of the travel forcefully. It may damage the headlight motor. Tighten up the lower nuts using a socket wrench.
Open the packet of silicone grease. Use the Q tip and put some silicone grease in the disconnect.
Put the relay back on the steel bracket. Plug in the headlight motor to the new pigtail. Tie wrap the harness so it is not in the way of the movement of the headlight bucket when in use. Use your cordless drill and raise and lower the headlight bucket a few times to make sure no wires touch the headlight bucket including the new ground wire. Use some black tie wraps as needed.
Plug in the headlight bulb routing the wire thru the square opening. Close the black plastic wire holder for the headlight bulb convoluted tube.
You are now finished with the passenger side.
Install the drivers side headlight relay:
The drivers side is basically the same as doing the passenger side. The one difference is there are 2 pink wires. The relay for the drivers side has a larger butt splice so both pink wires go into it.
You again will be adding the extra black ground wire.
Wrap the wires with some black tape. Add some silicone grease to the plug.
Install the drivers side headlight bucket. Put the new relay on the steel bracket. Plug in the headlight bulb wiring harness.
Tie wrap the harness on the drivers side so it is not in the way of the movement of the headlight bucket when in use. Use your cordless drill and raise and lower the headlight bucket a few times to make sure no wires touch the headlight bucket including the new ground wire. Use some black tie wraps as needed.
You should now be finished.
Final checks before reconnecting the battery:
Now check your work. Make sure the wire colors all match. Make sure no wires are in any place that they may get caught on a headlight bucket as it goes up and down. Tie wrap any wires as needed. Make sure you have removed all your tools etc.
Use the drill and special tool and slowly raise and lower each headlight bucket while you look for any possible obstructions etc. As I pointed out early one do not hit the end of the travel hard or you might damage the houings internally. If necessary correct any problems at this time. Raise and lower them a couple times so you can be sure everything clears etc.
Use your drill and raise each headlight bucket half way up. Make sure your headlight switch is in the off position.
Make sure no one is near the headlight buckets. The headlights will move right away when the battery is connected.
With everyone away from the headlight buckets you can reconnect the battery. The headlight buckets should go down as you put the battery cable back on. Push the headlight switch both ways to check the operation. At full open and full closed the knobs on the top of the headlight motors should raise and lower at the end of the headlight bucket movement. This means the contacts internally in the headlight motors have opened.
